PREMISE
The bias is something that becomes essential to know after a while that you are using the sewing machine.
From simple pot holders to a T-shirt collar, we always talk about bias!
In this post I would just like to share with you how to sew the bias in the corner because, when I started to use it, I didn’t really know how to do it and my works were affected by this, they didn’t look really finished.
Actually the bias is a great finish to make all your works look like professional.
VIDEO-TUTORIAL
So, as always, YouTube and Pinterest helped me to understand how I could do it: I found many blogs where they explain how to proceed, with photos and text, but I didn’t find many videos clear that explained step by step.
So, after having learned the technique, I decided to make a video-tutorial to explain how to do and here below you can watch it.
Under the video, always in this page, you will find a suggestion that was very helpful to me in order to make the bias appear good in the back as well.
TIPS
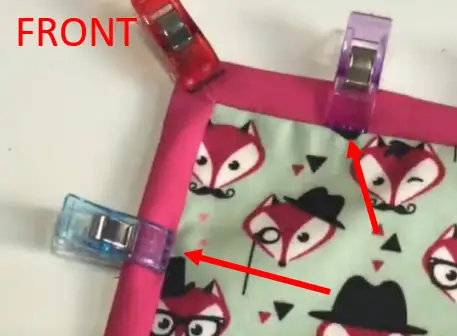
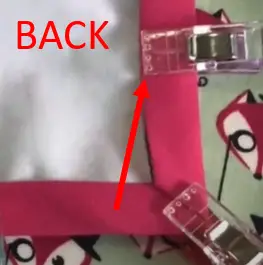
Once you have fixed the bias, before the final seam, turn the work and check that you do not see the previous seam on the back so it will be perfect there too.
Pin
Pin As you can see in the pictures, if you use the clips, instead of the pins, I recommend placing them with their ends at the edge of the bias. Doing that, you can immediately check if the back matches with the front and if the seam will be correct.
- About the Author
- Latest Posts
Hi, I’m Eleonora. I grew up in Milan and have been living in London since 2019. I left a corporate career to turn my lifelong passion for crafts into a full-time creative business. Creating with my hands has always been part of who I am – from crochet to sewing, from small handmade projects to full garments. I also have a soft spot for animals, especially cats. I started crocheting at a young age and later taught myself how to sew through books and online tutorials. Over time, I began experimenting with different techniques, patterns, and materials, discovering just how powerful and calming handmade creativity can be. That journey led me to share my knowledge online, first through YouTube and later through classes, patterns, and workshops. Today, I’m a crochet and embroidery teacher, helping others learn at their own pace and find confidence through making.


