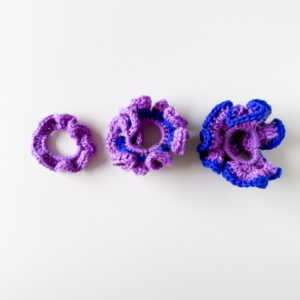
PREMISE
This pattern was born in the middle of a scorching summer (2026 really outdid itself, didn’t it?).
I was melting on the couch, way too hot to tackle anything big, but still needing my hands to be doing something. What I wanted was quick, fun, used barely any yarn… and ideally, actually useful once finished.
Enter the crochet scrunchie: small enough to make in an evening, perfect for using up leftover yarn, and something you’ll actually reach for every day.
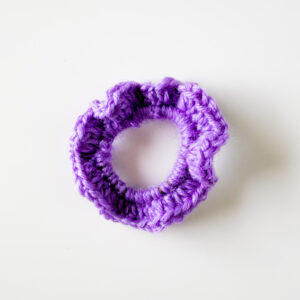
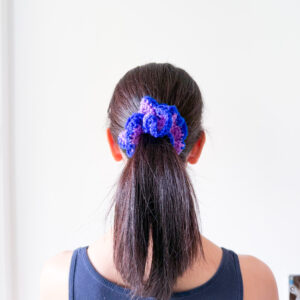
Fancy Scrunchie: A Beginner Friendly Crochet Project
In this blog post, I’m thrilled to share the free crochet pattern for this adorable scrunchie
So grab your hook, your favourite yarn and let’s get crocheting!
Decorations
- Crafting different borders: Play with contrasting colours or textured stitches to add a personal touch.
- Adding trimmings: Think pom poms or tassels, ruffles – the options are endless!
- Mixing colours and textures: Experiment with vibrant solids, playful patterns, or a combination of cosy and sparkling yarn
Sizes
This pattern comes in different sizes, it depends on how many rounds you’d like to make!
PATTERN INFORMATION
The pattern in this page is totally free, but it’s intellectual property of Elendipity.
You can use it and, of course, you can sell the final products you create, but you cannot sell the pattern or any alteration of the pattern.
It would be nice also if you could credit Elendipity (as pattern creator) whenever you create it, share it and/or sell it.
Feel free to tag me on my Instagram if you create it, I would love to see your works!!
AI Use
I’d kindly ask you not to upload this pattern to any AI tools to help you follow the instructions. You might not realise it, but by doing so you could be allowing the AI provider to use it as a basis for other patterns – which essentially means taking work away from creators like me, who put real heart and soul into designing patterns that actually work and are tested by me and other humans. If you need any help with the pattern, I’d be more than happy to support you – just send me a message here.
This pattern also has a full video tutorial inside my Crochet Subscription (in the project section of the Crochet Basics course).
You have a 7-day free trial if you want to check it out – click below:
HOW TO
The Fancy Scrunchie is created in rounds, starting by working into the hair elastic and then building outward from there. The instructions also give you the option of adding an optional border.
MATERIAL
- YARN AND HOOK: you can use any yarn you like (very small amount), just make sure to use the hook size recommended on the yarn label. The video explains how to adapt the pattern to your chosen yarn weight and hook size. I used acrylic yarn, Aran weight (medium), with a 5mm crochet hook.
- A hair elastic, any size, though I’d personally avoid the very small ones typically used for mini braids.
- Stitch Marker (optional, but recommended for beginners)
- Yarn Scissors
- Darning needle to weave in ends
TERMS
Here below the list of the stitches (US terms) that you are going to use for this project.
CH = Chain/Chains
st = Stitch / Stitches
SS = Slip Stitch
SC = Single Crochet
HDC = Half Double Crochet
You will always find the acronym of the stitch and a number close to it; if the number is before the name of the stitch, it means that you will have to repeat those stitches in the same space. For example: 5 SC = 5 Single Crochet in the same stitch / SC 5 = 5 Single Crochet in the next 5 stitches.
Shall we start?
Let’s go!!
SCRUNCHIE PATTERN
Here below you can find the FREE written pattern, remember that I have a full video tutorial in my crochet subscription – click below for more info.
START
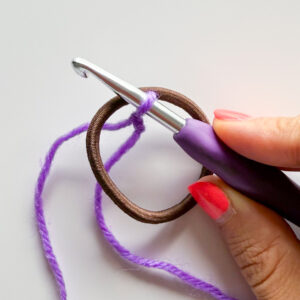
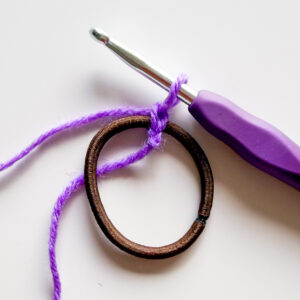
Create a Slip Knot and catch it from inside the hair elastic and CH 1 (this CH doesn’t count as st).
Pin
Pin - R1
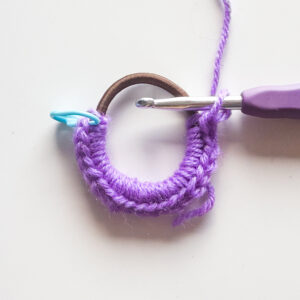
32 SC (or as many as you need to cover the elastic)* – SS to join – if you’d like to change colour, you can do it while doing the SS (in any round) – in the picture you see the elastic half covered.
*The number of stitches will depend on how big is your elastic and how thick is your yarn, so it could be lesso or more than my 32 stitches.
Pin - R2
CH 1 (that counts as st), 1 HDC in the same st where you did the SS and then 2 HDC in each of previous stitches – SS to join, 1 CH.
In the picture you see how it looks like if you stop at this round.
Pin - R3
CH 1 (that counts as st), 2 HDC in the same st where you did the SS and then 3 HDC in each of previous stitches – SS to join
- R4 (border – optional)
CH 1 and 1 SC in each of previous stitches – SS to join
Fasten off and weave all the ends.
In the picture you see how it looks like if you complete the border in a contrast colour.
Pin Remember that this pattern also has a full video tutorial inside my Crochet Subscription (in the project section of the Crochet Basics course).
You have a 7-day free trial if you want to check it out – click below:
Congratulations!
Now your Fancy Scrunchie is finished and you can decorate it as you like, maybe with some beads or sparkling thread!
Pin I hope you enjoyed this Free Pattern Pin
I have other many patterns available that you can find at this link.
Don’t hesitate to contact me if you need any explanation for the pattern – you can comment below or write me here.
I also offer crochet lessons (both in person or online) if you need some help with crochet creations and reading patterns. You find all the info for the classes at this link.
Feel free to tag me on my Instagram if you create it, I would love to see your works!
Happy Crocheting!
- About the Author
- Latest Posts
Hi, I’m Eleonora. I grew up in Milan and have been living in London since 2019. I left a corporate career to turn my lifelong passion for crafts into a full-time creative business. Creating with my hands has always been part of who I am – from crochet to sewing, from small handmade projects to full garments. I also have a soft spot for animals, especially cats. I started crocheting at a young age and later taught myself how to sew through books and online tutorials. Over time, I began experimenting with different techniques, patterns, and materials, discovering just how powerful and calming handmade creativity can be. That journey led me to share my knowledge online, first through YouTube and later through classes, patterns, and workshops. Today, I’m a crochet and embroidery teacher, helping others learn at their own pace and find confidence through making.


