PREMISE
I recently started to create a new collection of no-sewing amigurumi -free patterns (that you can find here) and I thought that it was time to add something Christmas-y to the collection.
Pin The first one of the Winter/Christmas collection was Bran the Snowman, you can find the free pattern here.
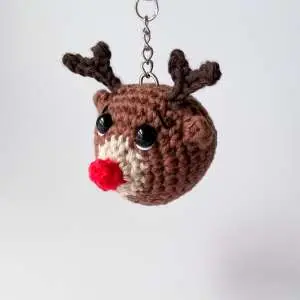
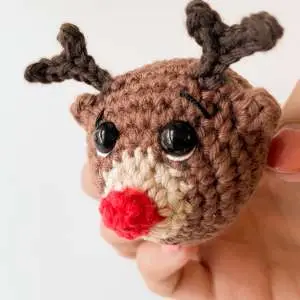
Pin Today I want to present you Ginny the Reindeer!!
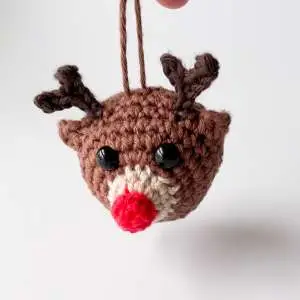
She can be made to hang at the Christmas tree or as keychain or simply as a toy!
Pin The pattern in this page is totally free, but it’s intellectual property of Elendipity.
You can use it and, of course, you can sell the final products you create, but you cannot sell the pattern or any alteration of the pattern.
You should also credit Elendipity (as pattern creator) whenever you create it, share it and/or sell it.
Feel free to tag me on my Instagram if you create it, I would love to see your works!!
Pin
Pin
Pin HOW TO
This amigurumi is worked from the front to the back of the animal, so you will begin from the nose to the head and you will continue working in round creating the ears and the antlers.
The Reindeer is worked in continuous rounds with the spiral method, not slip stitches to join.
Slip stitches at the beginning and the end of the antlers don’t count as stitches.
You will add the safety eyes halfway through and you will stuff at the end (in the pattern it will be specified when to insert the eyes and when to stuff).
In the ad-free version of the pattern there are also some advices on how to add safety eyes.
There will be some colour change and I recorded a video to show you how to change colour in amigurumi, you will find the video at this link.
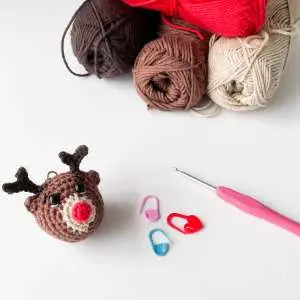
MATERIAL
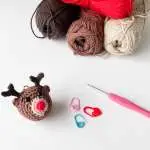
I used:
- Crochet hook 3mm
- Hobbii Rainbow Cotton 8/6, colour n. 058 (Red – R6) – less than 1 gr
- Hobbii Rainbow Cotton 8/6, colour n. 004 (Beige – B6) – 1 gr
- Hobbii Rainbow Cotton 8/6, colour n. 007 (Brown – BR6) – 6 gr
- Hobbii Rainbow Cotton 8/6, colour n. 008 (Dark Brown – DB6) – less than 1 gr
- safety eyes
- stitch marker
- stuffing
- darning needle
- Black and white embroidery thread for the eyes (optional)
I bought the yarn at Hobbii.
TERMS
Here below the list of the stitches (US terms) that we are going to use for this project.
- MC = Magic Circle
- CH = Chain
- SS = Slip Stich
- SC = Single Crochet
- HDC = Half Double Crochet
- INC (Increase) = 2 stitches in the same stitch
- DEC (Decrease) = 1 stitch worked over two stitches – it would be better if you know how to do Invisible Decrease.
- st = stitches
- BLO = Back Loop Only
- FLO = Front Loop Only
- Number in brackets, at the end of each round, indicates the total stitches for the round.
- Instruction between * … * means you have to repeat what is between the asterisks by the times indicated after the second asterisk.
- Instruction between ( … ) means you have to do all the stitches in the brackets in the same stitch.
- You will always find the acronym of the stitch and a number close to it; if the number is before the name of the stitch, it means that you will have to repeat those stitches in the same space. For example: 5 SC = 5 Single Crochet in the same stitch / SC 5 = 5 Single Crochet in the next 5 stitches
Shall we start?
Let’s go!!
REINDEER
START
With 3mm crochet hook and the colour R6, create a MC and work R1 in the MC.
- ROUND 1
SC 4 (4)
- ROUND 2
* INC * x 4 (8)
- ROUND 3
* SC 2, DEC * x 2 (6), change colour to B6
- ROUND 4
FLO: * INC * x 6 (12)
- ROUND 5
SC 3, INC, FLO SS 3, INC, SC 3, INC (15), change colour to BR6
- ROUND 6
FLO: INC, SC 4, INC, SS 2, SC 2, INC, SC 4 (18)
- ROUND 7
* INC, SC 2 * x 6 (24)
- ROUND 8
* SC 3, INC * x 6 (30)
- ROUND 9
SC 30 (30)
- ROUND 10
SC 11, CH 1, Right Ear (FLO: HDC 1, CH 1, SS 1 on top HDC, HDC 1, CH 1), SC 1, change colour to DB6, Right Antler (FLO: SS 1, CH 6, starting from 2nd CH from the hook SS 3, CH 3, from the 2nd CH from the hook SS 2, SS 2, SS 1 in the same FLO where you did the very first SS 1, changing colour to BR6), SC 5, change colour to DB6, Left Antler (FLO: SS 1, CH 6, from the 2nd CH from the hook SS 2, CH 4, from the 2nd CH from the hook SS 3, SS 3, SS 1 in the same FLO of the first SS 1, change colour to BR6) SC 1, CH 1, Left Ear (FLO: HDC 1, CH 1, SS 1 on top HDC, HDC 1, CH 1), SC 8 (30 + 2 Ears + 2 Antlers)
When you change colours, never cut the colour BR6!
- ROUND 11
SC 11, BLO DC 1, SC 1, BLO SC1, SC 5, BLO SC 1, SC 1, BLO DC 1, SC 8 (30)
- ROUND 12, 13, 14 (3 rounds)
SC 30 (30)
- ROUND 15
* DEC, SC 3 * x 6 (24)
- ROUND 16
* SC 2, DEC * x 6 (18)
- ROUND 17
* DEC, SC 1 * x 6 (12)
- ROUND 18
* DEC * x 6 (6)
EMBROIDERY (optional)
If you want, you could embroider the eyebrows with black thin yarn or embroidery thread and some eye decorations with white yarn or embroidery thread.
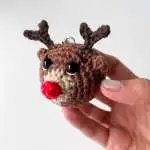
Pin And HERE WE ARE: your REINDEER amigurumi no sewing is done! 🦌
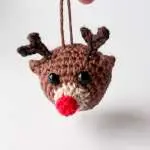
Now you can decide to leave it like this or to add a keychain or a loop for hanging her at the Christmas Tree or in the house as decoration.
Pin
Pin
Pin
Pin I hope you enjoyed this Free Pattern Pin
At this link you can find the same pattern but it’s an ad-free PDF version with more than 30 photos that will guide step by step through the process.
I have other many patterns available that you can find at this link.
Don’t hesitate to contact me if you need any explanation for the pattern – you can comment below or write me at info@elendipity-com.stackstaging.com.
I also offer crochet lessons (both in person or online) if you need some help with crochet creations and reading patterns.
You find all the info for the classes at this link.
Feel free to tag me on my Instagram if you create it, I would love to see your works!6
Happy Crochet!
- About the Author
- Latest Posts
Hi, I’m Eleonora. I grew up in Milan and have been living in London since 2019. I left a corporate career to turn my lifelong passion for crafts into a full-time creative business. Creating with my hands has always been part of who I am – from crochet to sewing, from small handmade projects to full garments. I also have a soft spot for animals, especially cats. I started crocheting at a young age and later taught myself how to sew through books and online tutorials. Over time, I began experimenting with different techniques, patterns, and materials, discovering just how powerful and calming handmade creativity can be. That journey led me to share my knowledge online, first through YouTube and later through classes, patterns, and workshops. Today, I’m a crochet and embroidery teacher, helping others learn at their own pace and find confidence through making.


